
Field communication starts with file prep. So does risk management.
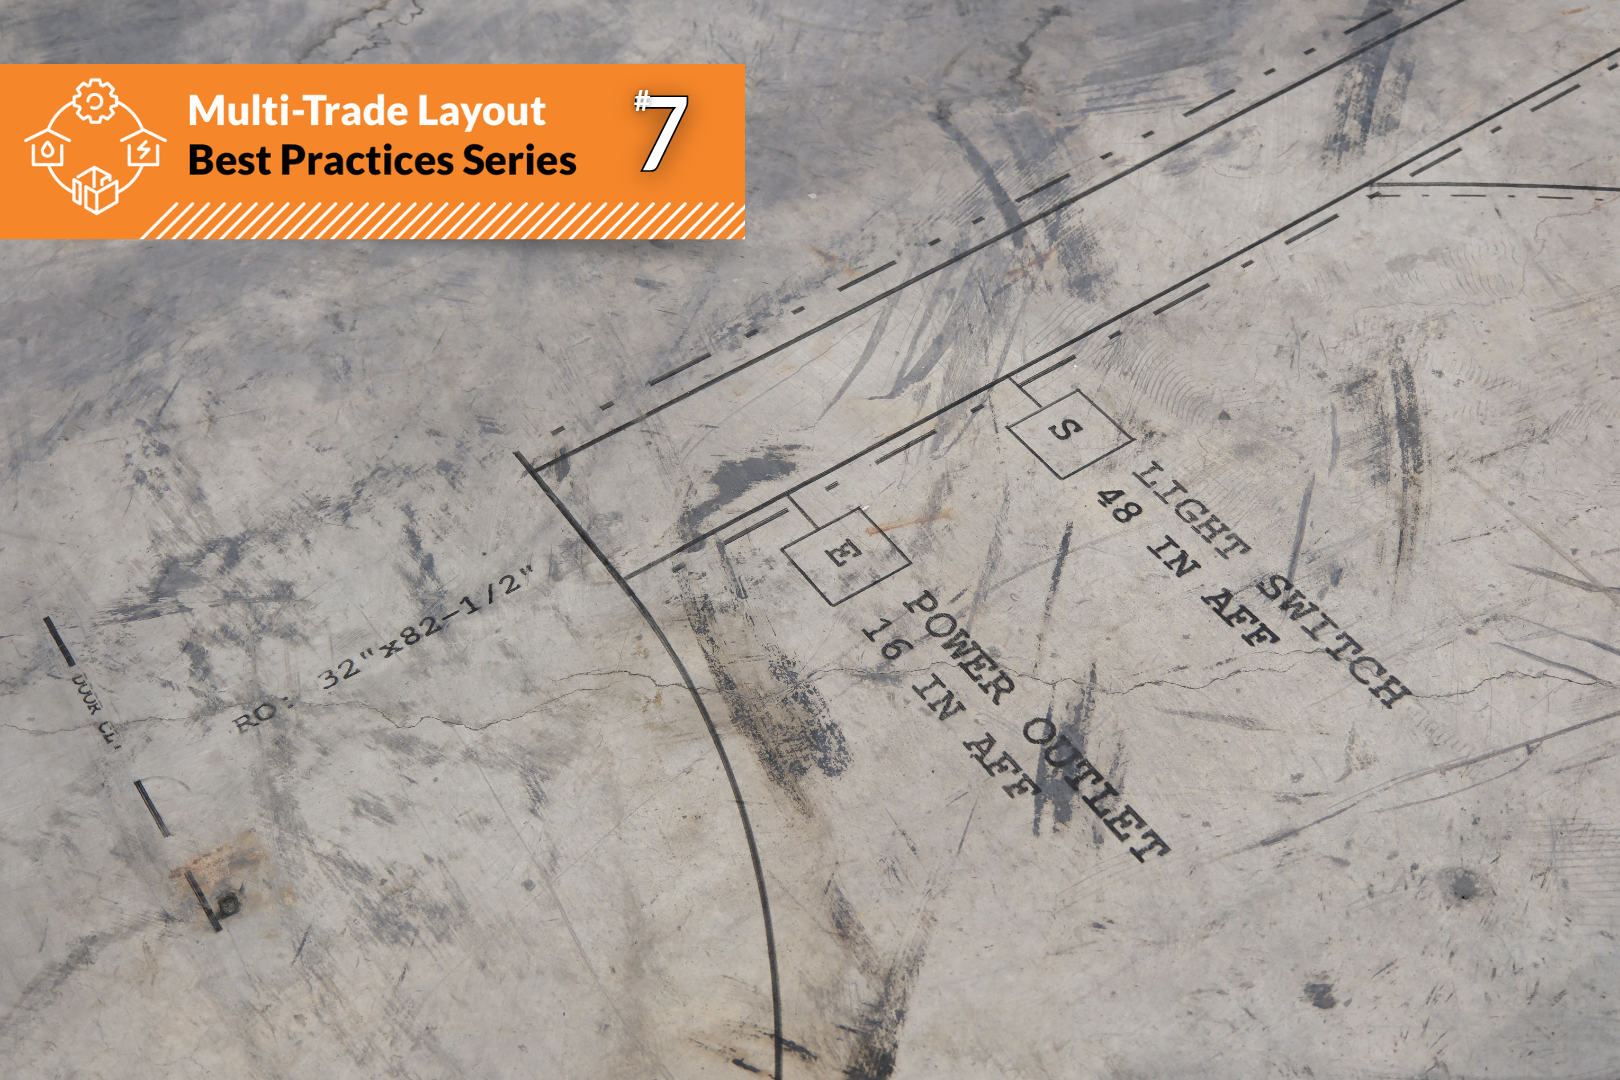
Multi-Trade Layout uses automated layout to move coordinated, actionable information from the model to the field. It's a communication workflow that gets information from the digital environment to the jobsite.
In part 5 of this series, we mapped the Multi-Trade Layout timeline: when each phase needs to happen relative to print day. In part 6, we mapped accountability: who owns what, and who has to sign their name to it. Now, we focus on the Coordination phase and its two components: Kickoff and File Prep.
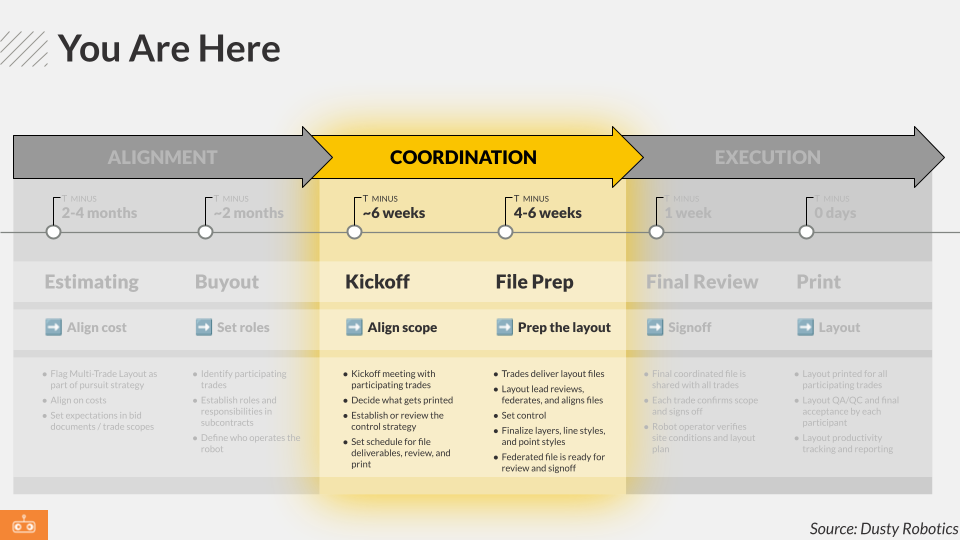
The whole point of Multi-Trade Layout is to use layout as the vehicle to communicate design information from the model to the field. That means these two steps are at the heart of the mission — but managing the information flow carelessly can inject serious risk into your project. This article is about how to avoid that pitfall.
Skipping file prep entirely leads to disaster
The fastest way to understand what file prep is for, is to imagine skipping it.
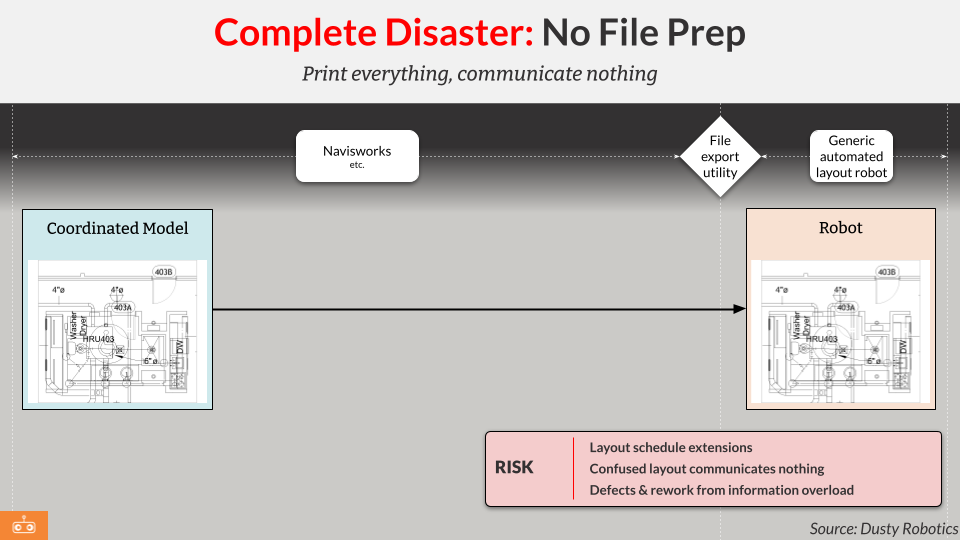
A coordinated BIM model contains everything anybody ever needed to know. That's the problem. There’s information in there supporting everything from virtual walkthroughs with the owner, to estimating, scheduling, coordination, and field end-uses.
It contains all the information the field needs to build, but it is not optimized to communicate that information. That's the job of the layout.
If you print everything in the model, the result will be epic print times, a layout so dense the field crew can't read it, and rework and defects from information overload. Try to say everything, and you communicate nothing.
The guiding principle for layout: communicate more with less
File prep is the process of producing a layout file optimized for field communication. Good file prep is a series of decisions about what to communicate and how to do it with clarity. With automated layout, you can print anything. But that doesn't mean you should print everything. Here are a few examples of what we mean:

In the model, you need a fully-articulated depiction of fixtures and equipment to make plans and 3D renderings easily comprehensible for everybody from owners to plan-check officials. But in the field, installers need far less information. In the example above, all installers really need to know about this piece of industrial equipment is the centerline, where the baseplates should sit, and where to drill for anchor bolts. Printing the entire object from the model has several downsides. It clutters the floor and doesn’t give installers any additional actionable information. And it slows down the robot. We’ve seen CAD objects like industrial or medical equipment, fixtures, and permanently-installed furnishings (e.g. auditorium chairs) contain several hundred individual line segments. For the robot, each of those line segments is a print task, and those tasks add up fast across the entire project.

In LOD400 models for complex, constrained projects like hospitals, individual studs are modeled as objects containing up to 12 line segments. In the layout, you really only need two line segments — one to indicate the position of the stud, and the other to indicate the direction. Furthermore, it’s helpful to let that linework project slightly past the line indicating the position of the track. That way, installers can still see the stud layout after the track is put in place.
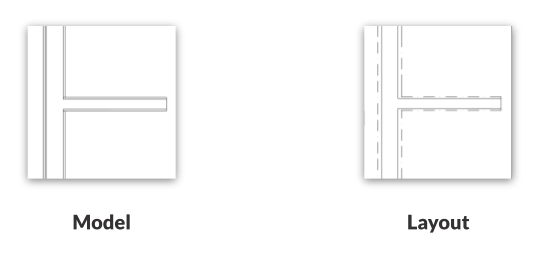
You’ll want to leverage linestyles differently for layout than you would in the model. Linestyles in the layout can be used to indicate the difference between trades’ scopes of work or between building elements (in this example, a solid line indicates wall track while a dashed line indicates finish). Dusty has a robust set of custom linestyle features that even allow you to create linestyles with embedded text, making it crystal clear whose linework is whose in Multi-Trade Layout.
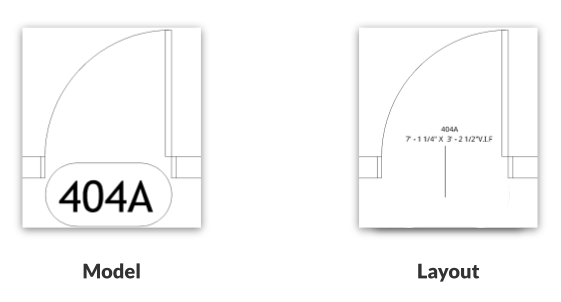
In some cases, you might consider expanding the information you include in the layout. A simple door tag forces an installer to put down their tools and go consult the door schedule. Printing the rough opening centerline and dimensions on the floor keeps the tools in their hands and the work moving forward.
These are just a few examples. If you want to dive deep into trade-by-trade recommendations for layout file prep, check out our guide here.
The next question is, how do you organize the file prep workflow for success.
File prep without clarity of ownership creates serious risk
You can choose the right linework, assign meaningful layer names, and keep scope clean, but still have a file prep process that leads to serious problems downstream.
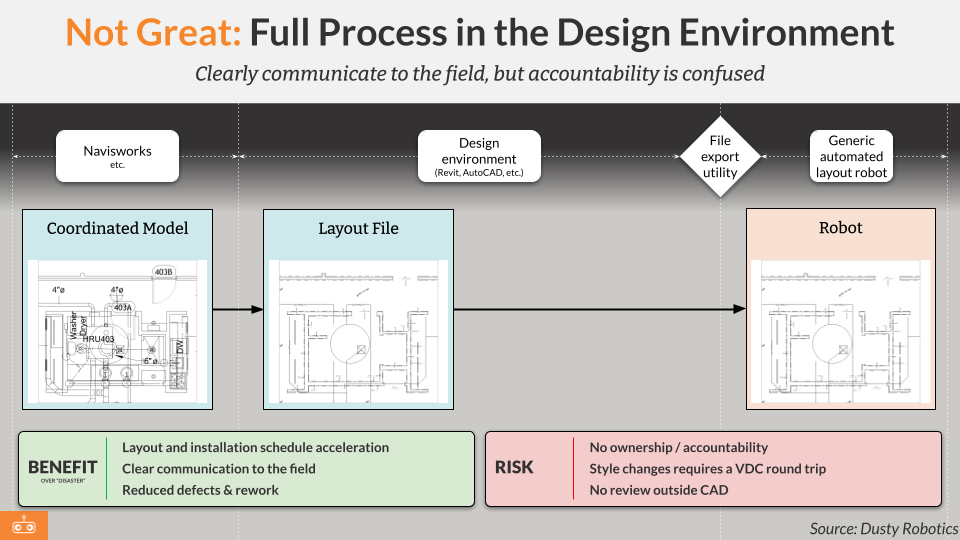
The most common approach: all file prep happens inside the design environment. VDC managers across every participating trade work together in the same file to prep the layout, and then that file goes to the robot. The good news is, you get control over what information flows to the field.
But here’s the problem: Who owns what in the file? When three or four trades contribute scope to a single combined layout file, we’re not just talking about logistical complications around file-sharing. You’ve created a confused picture of who owns what parts of the layout, and you’ve obstructed clear lines of accountability. Trades can’t control their own risk, so they may resist participation in the process altogether. And the GC can’t effectively hold trades accountable for their layout scope, so they’ve essentially accepted that risk for themselves.
This approach also means even small changes to the layout (swap a line style, update point styles for one trade, remove a layer) require a round trip through VDC, because proficiency in design software like AutoCAD is the gatekeeper to making any layout modification. Field crews can't review or verify their own scope without someone walking them through the combined file. And if the VDC manager who assembled everything is unavailable, the workflow stops.
Other automated layout solutions will give you a place to store the combined file and track its versions. What they don't give you is a place to review it. And they don't offer a structure that says whose work is whose, because by the time the information reaches the automated layout system, it has already been flattened into one file.
A better model: bring Dusty Portal into the workflow
A meaningful improvement: move the review and verification step out of the design environment and into Dusty Portal. Portal is an easy-to-use, cloud-based solution for layout prep that is built for collaborative Multi-Trade Layout from the ground up.
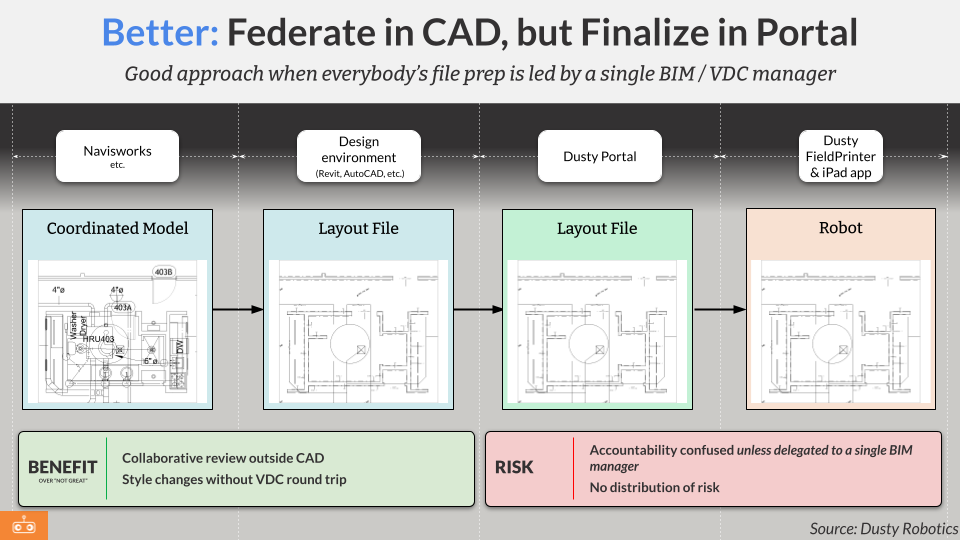
Portal gives everybody — even those without Autodesk AutoCAD or Revit — the ability to review the layout file before it’s printed. It also allows teams to manipulate the appearance of the layout: adjusting linestyles or point styles, layer management, and adding annotations can all be done directly in Portal.
For many teams, taking the first step into leveraging Portal means they’ll still prep a combined multi-trade layout file in AutoCAD, but then move this artifact into Portal where it can be reviewed and finalized collaboratively as a team.
This works well when a single BIM/VDC manager leads all file prep (whether that’s the GC’s VDC team or a third party partner). They touch every layer, coordinate every trade's scope, and deliver a clean federated result. When that person or team is strong and engaged, the outcome is strong too.
But accountability is still centralized. That's a single point of failure. And it doesn't distribute risk across the trades who actually own the work.
Best practice: file ownership for trades, federation in Portal
The most scalable and risk-managed approach for everybody involved is to give each trade ownership of their part of the layout, but without sacrificing the collaborative principles established above.
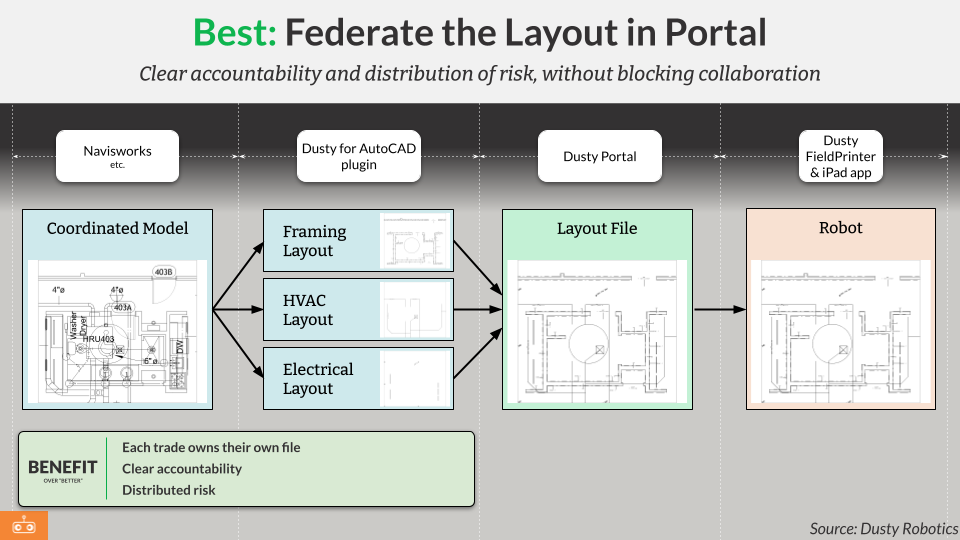
Doing that takes tech that was built for this workflow. Dusty Portal is designed to intake multiple files and overlay them into a single layout automatically. The source file and layer structure is preserved, keeping everything from collapsing into an undifferentiated mess. Each trade’s layout stays encapsulated in their file. Their accountability for that content is preserved. But the team can review everybody’s single, federated layout.
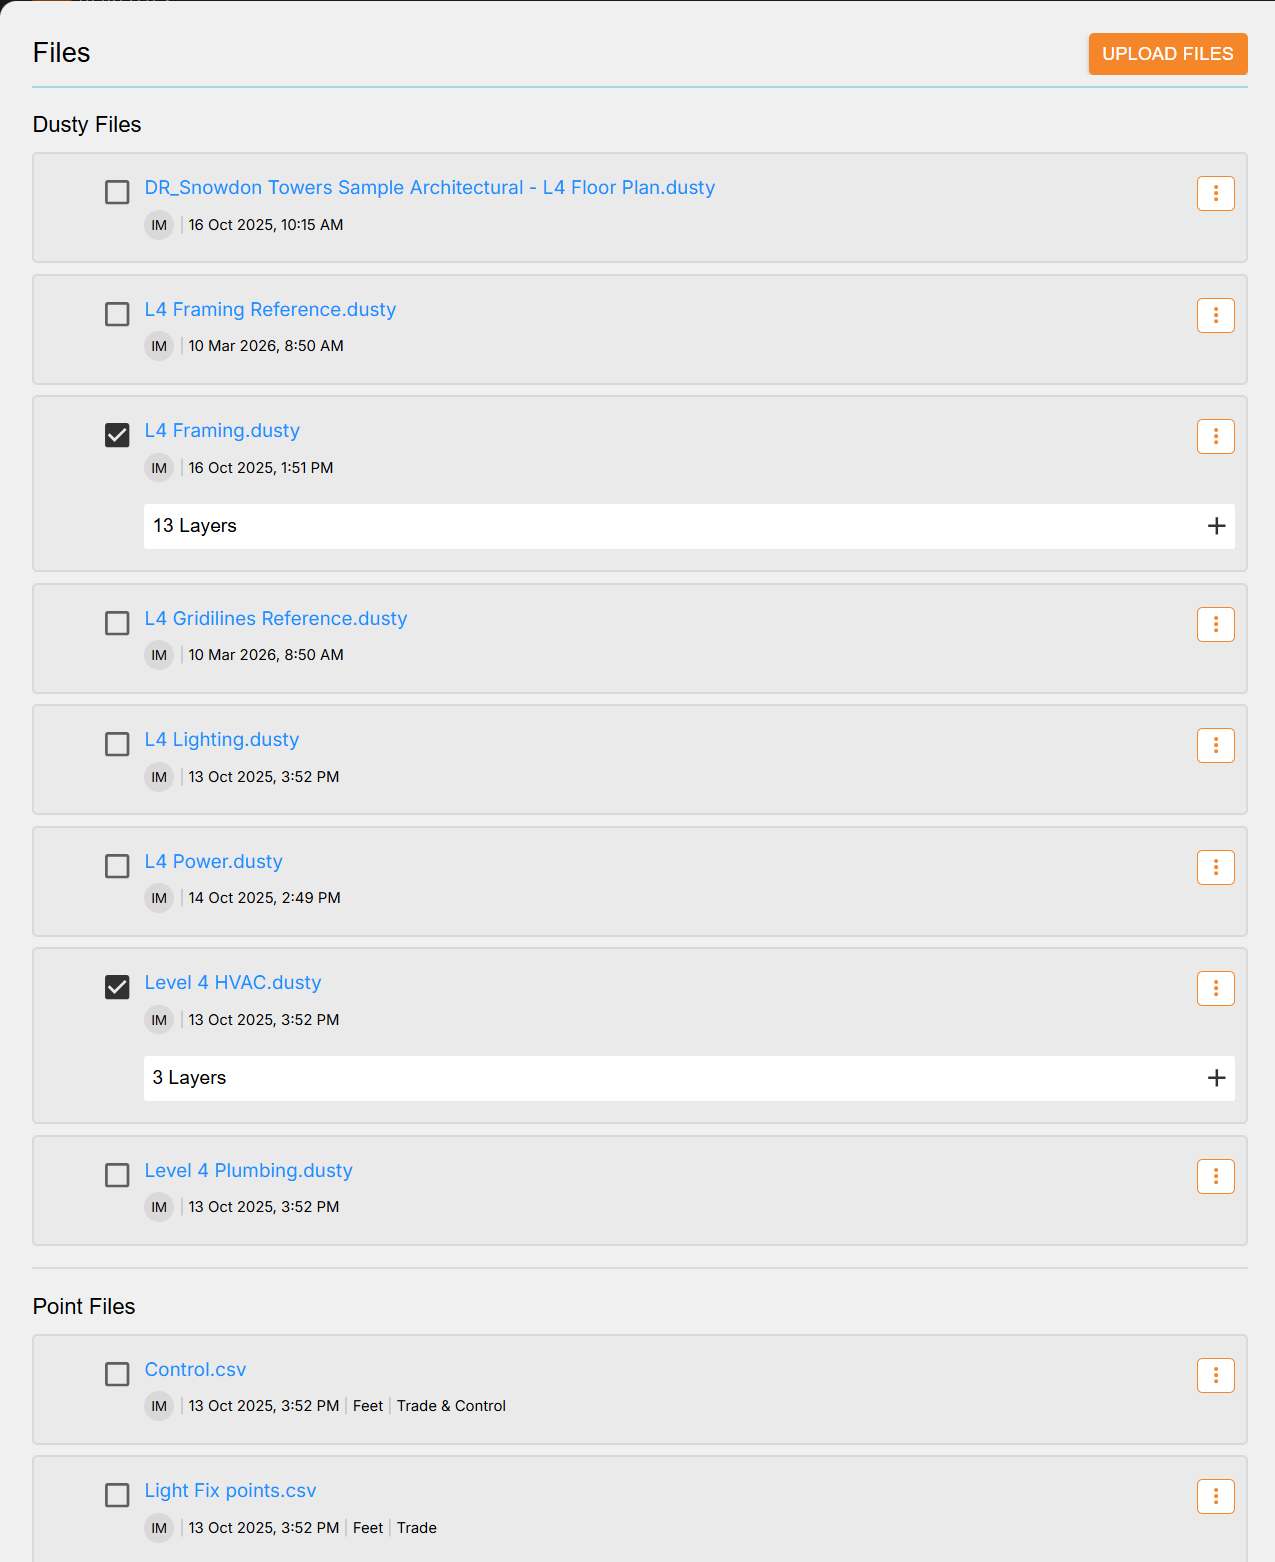
This does several things at once. It makes accountability legible: if framing layout prints wrong, that's the framing sub's file. If there’s a change in the electrical scope of work, their layout file can be modified without impact to the others. It distributes risk: a problem with one trade's file doesn't contaminate or block the others. It makes review meaningful: each trade can look at their own file in Portal and confirm their scope is correct, rather than parsing a combined layer stack they didn't build.
It also makes execution in the field easier. If the field needs to print one party’s layout early, that can easily be done by selecting the right layers. If they need to make a quick change in linestyles, that’s do-able from the field. If union rules require different robot operators for different layout scopes, that’s just a matter of selecting the right layers before operators hand off the robot.
Dusty Portal is built for this best practice approach. Other automated layout solutions don't give you the tools to manage anything other than a single, combined layout file. And that means they really weren’t designed for Multi-Trade Layout at all.
Catch up on our series
This article is #7 in our deep-dive series on best practices for the Multi-Trade Layout workflow powered by Dusty. If Automated Layout is the technology, Multi-Trade Layout is the process, and this series is all about how to do it right. In our next installment of this series, we’ll go through the nuts and bolts of the file prep workflow under this best practice approach. Catch up on the rest of the series below.
Foundations
#1: The Bottleneck That's Costing You Time, Money, and Trust. What's wrong with traditional layout in modern construction?
#2: Multi-Trade Layout: The Construction Workflow That Changes Everything. An introduction to Multi-Trade Layout, how it works, and how it's different.
Workflow Strategy
#3: Four Decisions Every GC Needs to Make to Implement Multi-Trade Layout. Who leads the workflow? What’s in-scope for Multi-Trade Layout? When will all this happen? How will you execute?
#4: What Goes on the Slab? How to Decide Who—and What—Gets Included in Multi-Trade Layout. How to decide what trades to involve. Reimagining what layout can communicate. Deciding what to print.
#5: When Does Layout Start? Earlier Than You Think. How to schedule for Multi-Trade Layout — and what to do when the job is already underway.
Implementation
#6: Inside Multi-Trade Layout: Who Does What, and When. Roles and responsibilities. Who does what, and when.
#7: Field communication starts with layout file prep. So does risk management. (You're reading it!) You can print anything, but it doesn't mean you should print everything. How to make good decisions about what to print while managing layout accountability.